Nothing more annoying that browsing a website that indicates insecure content with an red sign on the address bar.
Imagine running a website that deals with sensitive data, being it personal records coming from a web form or anything else where the connection is insecure. Your visitors wouldn’t be happy with that.
Today, most of the professional websites utilize SSL certificates. Even Google pushes towards secure URL in its indexing mechanism. Some sources even claim that HTTPS-links are better crawled by search engines.
In the article, we will go through some possibilities on how to get rid of the “red sign address bar”. Furthermore, implementing an SSL certificate on your website doesn’t need to be costly – if not free of charge 😉
Table of Contents
What is SSL or an SSL Certificate?
SSL stands for Secure Socket Layer and it is the standard security technology for establishing an encrypted link between a web server and a browser. This secure link ensures that visitors (=customers) data remains private and encrypted during transmission.
An SSL Certificate is a digital certificate that proves the host (website’s visitors) that the corresponding web service has the ownership of the domain. The issuance is done by the Certificate Authority (CA).
There are different Certificate Authority entities worldwide, with Comodo, Symantec, GlobalSign, DigiCert being the well known. A W3Techs survey from May 2018 shows that IdenTrust, a cross-signer of Let’s Encrypt intermediates, has risen to be the most popular SSL certificate authority.
Let’s Encrypt and CloudFlare
Let’s Encrypt and CloudFlare are 2 SSL CA providers where I would like to pay attention at.
Let’s Encrypt is a non-profit certificate authority that provides X.509 certificates at no charge. The certificates issued by Let’s Encrypt remain valid for 90 days, and during the time they can also be renewed. The project’s goals are to make the World Wide Web servers standard encrypted.
On the other hand, CloudFlare is a company that provides content delivery network services, DDoS attack protection, internet security and Domain Name Server services. I personally recommend using CloudFlare’s services for your website.
CloudFlare
CloudFlare is my favourite free method to encrypt the traffic to my website. It is also easier and simple to configure.
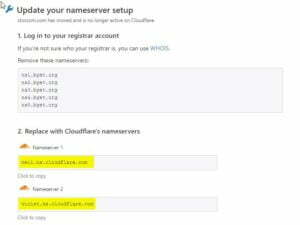
All you need to do is create an account, verify domain ownership and replace your domain name servers with CloudFlare’s own nameservers.
Let’s Encrypt
Enabling and installing an SSL certificate on your web depends on the type of web hosting you own. If your web runs on a dedicated server and you have root permissions you can easily request and install an SSL certificate from Let’s Encrypt – just read the manual.
In my case, I use Linux (shared) hosting from GoDaddy and my host runs on a Linux Cloud OS with limited root access rights.

Basically, if your hosting provider does not support Let’s Encrypt by default, you’ll have to use alternative ways to create the certificate request and approve it by Let’s Encrypt.
Hosting providers that support Let’s Encrypt can be found here.
In order to create the Certificate Signing Request (CSR) we will use an online freeware called ZeroSSL.
- Navigate to ZeroSSL.com
- Click on Online Tools
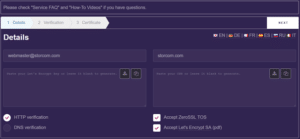
- Click Start to start the FREE SSL Certificate Wizard
- Enter your domain name (include a record with and without www-prefix)
- Make sure to check the following boxes:
– HTTP verification
– Accept ZeroSSL TOS
– Accept Let’s Encrypt SA (pdf) - In my case, I only entered storcom.com without the www-prefix but the wizard asked if I wanted to add the prefix
- Hit Next to proceed
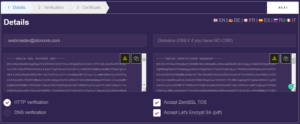
- At this point, we have received the CSR (Certificate Signing Request)
- Click Download or Save it manually in a text file
- Click Next to continue
- Once the Key Account is created, download it or save it manually
- At this point, we should have 2 separate files
– The CSR file and
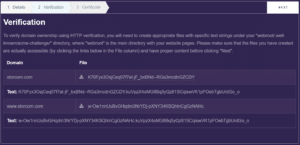
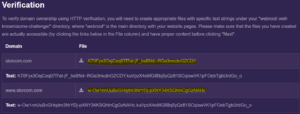
– The Key Account file - Next we will need to verify the domain ownership. Download 2 files below
- Navigate to your web hosting’s CPANEL and open the file manager
- On the root directory (i.g. public_html) create a folder .well-known and a subfolder acme-challenge. The directory structure should look like this:
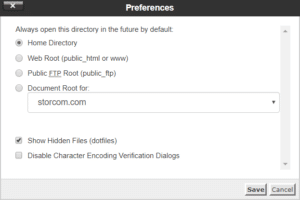
- If the folder is not visible, go to Settings (top right corner) and check Show Hidden Files (dotfiles)
- Under the .well-known/acme-challenge upload the 2 files we downloaded from step 13
- Navigate back to the ZeroSSL web and click on the links
If the links are resolved into text files you have uploaded, you should be OK to continue. - Proceed by clicking Next and your certificate should be created and valid for 90 days.
- Below the page, download the Certificate file (CRT) and the Domain (Key) file
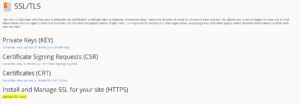
- Navigate to your hosting’s CPANEL and open TLS/SSL
- Click on Manage SSL sites
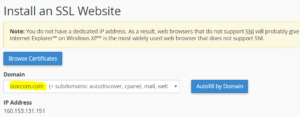
- Select your domain
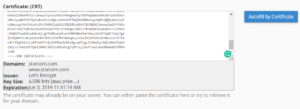
- Copy the text from the Certificate (CRT) file and paste it into the Certificate: (CRT) text box
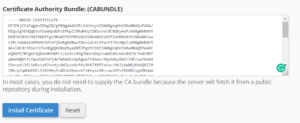
Notice that the CRT file includes both: the certificate itself and the certificate bundle. Cut or remove the certificate bundle, and paste it below on the 3rd box Certificate Bundle. - Copy and paste the Domain Key into the Private Key (KEY) text box
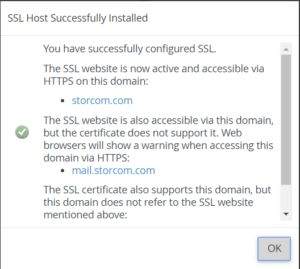
- Make sure the Certificate Authority Bundle (CABUNDLE) has been filled in and click Install Certificate
- Congrats! You have installed a free certificate on your website.
- Your website should indicate a valid SSL certificate.
Redirect HTTP to HTTPS
Finally, in order to use the installed certificate correctly, you will need to tell your webserver to always use HTTPS for incoming requests.
WordPress
- Go to your WP admin panel
- Navigate to Settings > General
- Modify the WordPress (URL) and Site Address (URL) to point to https
Non-CMS
Another way to accomplish it is to tell your webserver to redirect all HTTP requests to https. This can be easily done by adding a code to the .htaccess file.
Redirect on Apache webserver
- Go to your hosting’s file manager
- On the root directory /public_html edit or create a file called .htaccess
- Append the following code at the end:
RewriteEngine On
RewriteCond %{HTTPS} off
RewriteRule ^(.*)$ https://%{HTTP_HOST}%{REQUEST_URI} [L,R=301]
Redirect on Nginx webserver
- Go to your hosting’s file manager
- Look for nginx config-file
- Append the following code:
server {
listen 80;
server_name domain.com www.domain.com;
return 301 https://domain.com$request_uri;
}
Any suggestion or question? Leave a reply below, or feel free to contact us. Make sure to subscribe to our mailing list to get the latest.


