

Having a web-based app running over unsecured protocols like HTTP, might not only be unsafe but also unprofessional. Therefore, most of the enterprises opt for secure traffic over HTTPS. In this article, we will implement Service Processor SSL Certificates signed by CA. 3PAR StoreServ Service Processors run by default over unsecured HTTP protocol. Installing an SSL Certificate is something every administrator should consider.
A technical whitepaper of Best Practices for Implementing HPE 3PAR Service Processor can be found here.
Running SP version 5.5 or later? Then read our other blog post Installing SSL certificates on 3PAR Service Processor 5.x.
How to?
Creating a Certificate File Request
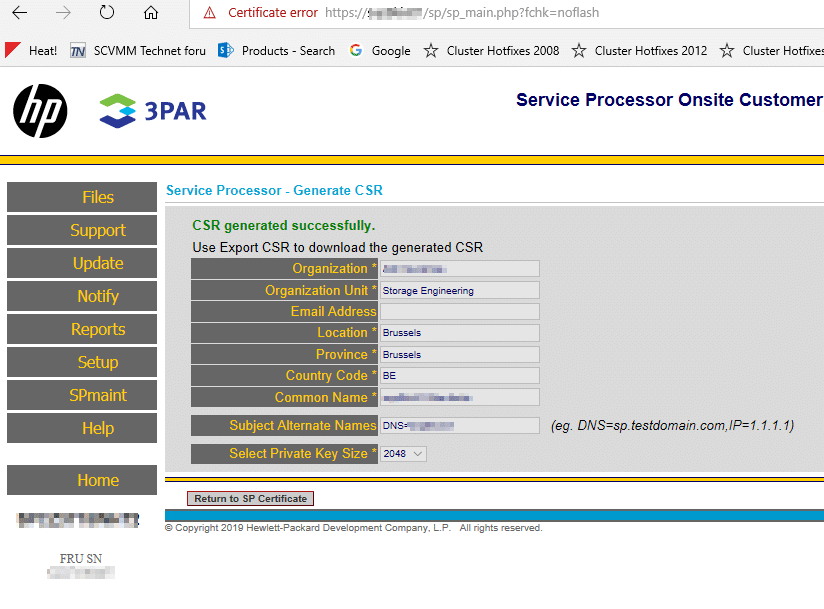
- Navigate to your Service Processor webpage https://<sp_name>
- Log in with you customer credentials
- On the left pane, click on Support > SP Certificate
- On this page, click on Generate CSR
- Enter your information, including certificate’s Common Name and SAN (Subject Alternate Names)

Adding a SAN record is very important as recent web browsers still give errors when a certificate does not contain this information. - Click on Generate CSR and return to the previous window.
- On the next step click on Export CSR

- After exporting the file, click on Download File and save it locally

Signing and importing the Service Processor SSL Certificates
At this point, we have created a request file which will be signed by our Certificate Authority. In large enterprises, certificate handling is done by a separate department. You could also give a try by yourself. Here is a good article about signing certificates with Microsoft CA.
Once you have signed your certificate, you will get a file with .cer as an extension.


- Navigate to your service processor’s webpage and select Import Certificate
- On the first step we’re going to load the Service Processor SSL certificates we have just signed in the previous step.
(Bear in mind the sequence) - Browse the certificate’s location and click on Load Certificate

- On the following screen, we are going to load the intermediate certificate of the CA or the Issuing Certificate.

- Finally, we will upload the Root Certificate. Browse the file and click on Import Certificate.

- Once the 3rd certificate (the certificate from the previous step) the Web Service of the Service Processor will restart.

- Make sure to close any active browser before navigating again to the service processor
- Next time you navigate to the array’s SP the SSL certificate should be valid.


Any suggestion or question? Leave a reply below, or feel free to contact us. Make sure to subscribe to our mailing list to get the latest.


5 Responses
Any chance you have the same process for an 8440 running version 5.X of the SP software?
Yes, already tested. Will have it published tomorrow 😉
New article is online: https://storcom.com/installing-ssl-certificates-on-3par-service-processor-5-x/
Enjoy the reading.
Awesome, thanks!
Thanks, can we get the same steps via CLI.